
QuickBooks is holistic software that encompasses varied functions. It is equipped with many inbuilt features, making it practical and distinct. One such noteworthy feature of QuickBooks is the QuickBooks Scan Manager, a state-of-the-art feature that allows a user to attach files to your sales receipts, bills, and invoices. It is an uncomplicated feature that automatically gives balance sheet updates, invoices, and additional online documents related to business operations.
In this article, we are going to discuss about the complete process for fixation of QuickBooks scan manager not working problem. So, keep reading!
Advantages of Using the QuickBooks Scan Manager
QuickBooks Scan Manager offers many advantages, some of which are enlisted below.
- The files can be attached to invoices, bills, sales receipts, and other business activities.
- No need to be an expert in accountancy.
- Easy process to link it to your bank accounts.
- Easy to import and classify your transactions.
- The scan manager is equipped with updating balance sheets auto in QuickBooks Scan Manager.
- It helps accomplish tasks on time.
What triggers the ‘QuickBooks Scan Manager, not working’ Error?
Below are listed some of the chief causes behind the QuickBooks Scan Manager Not Working error. This error might be caused to any of them (or some of the) enlisted factors.
- Unable to detect the scanner.
- You may be unable to find the scanner driver.
- Scan Manager is not responding.
- Issues confronted while opening the document in multi-user mode.
- Incompatible scanning device or scanning manager.
- The inability of QuickBooks Scan Manager to create a new profile.
- The Scan Manager is lagging.
Troubleshooting methods to resolve ‘QuickBooks Scan Manager not working error.
This segment shall apprise you with all the methods you need to resolve the QuickBooks Scan Manager not working error successfully. Follow each procedure sequentially and if the issue persists, jump to the subsequent process.
Method 1: Update your QuickBooks Desktop
To update QuickBooks Desktop to its latest version, ensure that you follow the directions below sequentially.
- Right-click on the “QB” symbol on your system.
- Select “Properties” from the drop-down menu
- Select ‘Find a Target’ from the drop-down menu in the new window.
- Select ‘Properties’ from the context menu of the ‘QBW32.exe’
- Navigate to the ‘General’
- Select the file’s version from the drop-down menu beneath ‘Item Name.’
- Check the ‘QuickBooks’
- Find the most recent version of the accounting software from ‘Google.’
- Now you must download and install the QuickBooks updates.
- Check if the ‘QuickBooks Scan Manager’ is working by launching it.
Method 2: Use TWAIN Scanner
You can get rid of this error by using the TWAIN scanner. Make sure that you are connected to a seamless internet connection.
Follow the steps to use the scanner:
- If you’re using a new device, ensure Scan Manager is configured to allow you to attach your documents. Also, look for scanners that are compatible with QuickBooks Scan Manager.
- Make sure your scanner isn’t turned off and is ready to use.
- Make sure the ‘TWAIN’ scanner is being used for scanning.
Method 3: Repair QuickBooks via the Windows Repair Utility
To repair QuickBooks by using the windows repair utility, follow the steps below:
- Use the Windows Repair Utility to fix QuickBooks.
- Reboot your system to ensure that no other background processes are interfering with the Repair
- Select Programs and Features from the Control Panel.
- Select Uninstall a Program and then QuickBooks from the list of programs.
- Click ‘Continue’ or ‘Next’ after selecting Uninstall / Change.
- Select ‘Next after clicking Repair.’
- When the Repair is complete, click ‘Finish.’
- Restart your computer system and update QuickBooks Desktop if any updates are available.
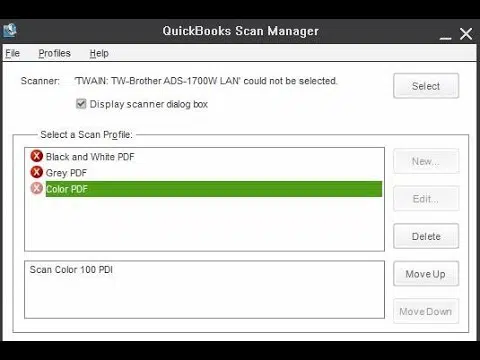
Method 4: Delete the Scan Profile and Create a New One
Deleting the scan profile from the scan manager and creating a new profile can help eliminate this error. In this context, follow the steps mentioned below:
- To begin, open QuickBooks and select the Company menu.
- Select Documents and then Doc Center from the drop-down menu.
- Click on the old scan profile under Scan a Document.
- To remove the profile from the QuickBooks scan manager, select Delete.
- Return to the Doc Center and select Scan a Document from the drop-down menu.
- Select New and give the profile a name.
- After that, select Continue and make the necessary changes to the profile settings.
- Finally, click Save.
Through this article titled ‘QuickBooks Scan Manager Not Working,’ we are hopeful that we could address your queries related to the error. After going through this article, you must have resolved the QuickBooks Scan Manager is not working. However, if that doesn’t happen, feel free to contact our QuickBooks desktop technical support Team via 1-800-615-2347.


